Credits
How to implement a credits system to track usage across multiple different features.
When you have multiple features that cost different amounts, you can use a credit system to deduct usage from a single balance. This can be great to simplify billing and usage tracking, especially when you have lots of features.
Example case
We have a AI chatbot product with 3 different models, and each model costs a different amount to use.
- Small AI model: $1 per 1000 tokens
- Medium AI model: $10 per 1000 tokens
- Large AI model: $50 per 1000 tokens
And we have the following products:
- Free tier: $5 credits per month for free
- Pro tier: $100 credits per month, at $100 per month. We also want to allow for overage pricing if they go over 100 USD.
Setup
Features
Let’s create the following features:
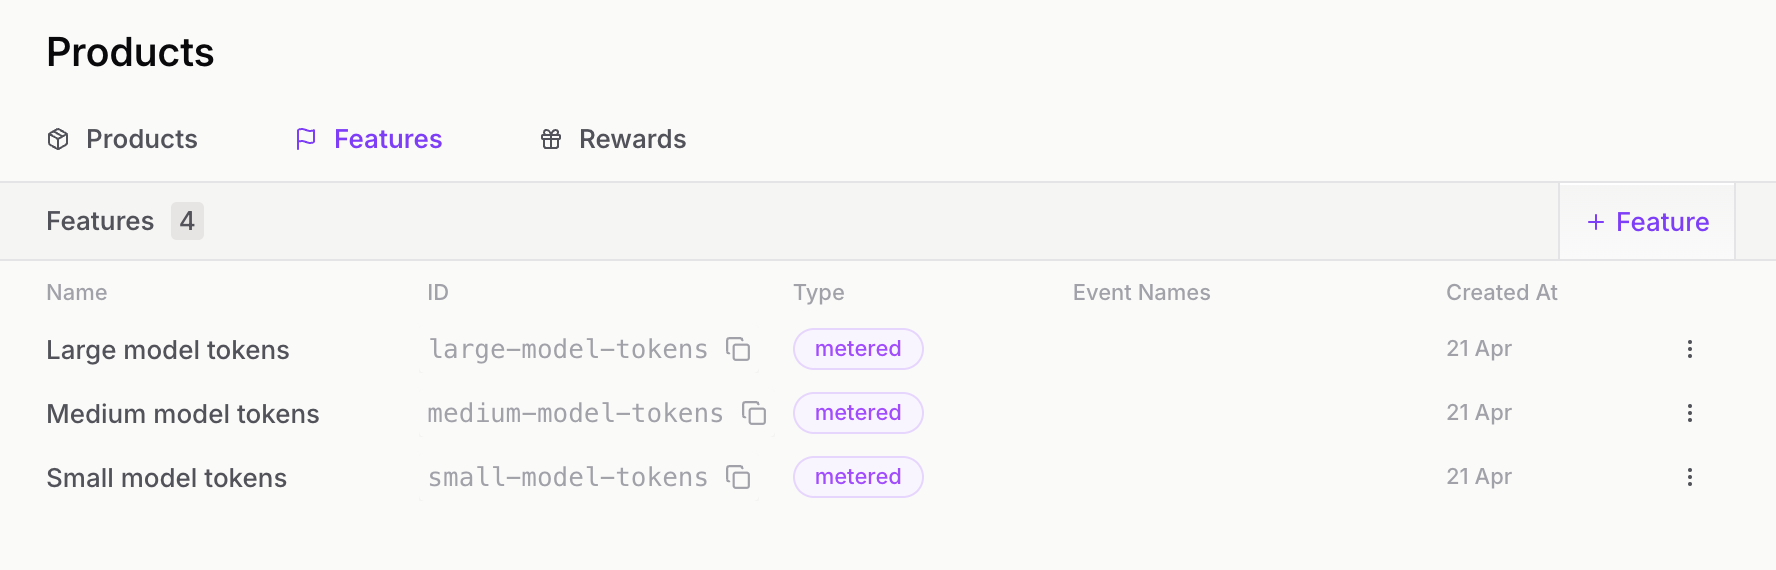
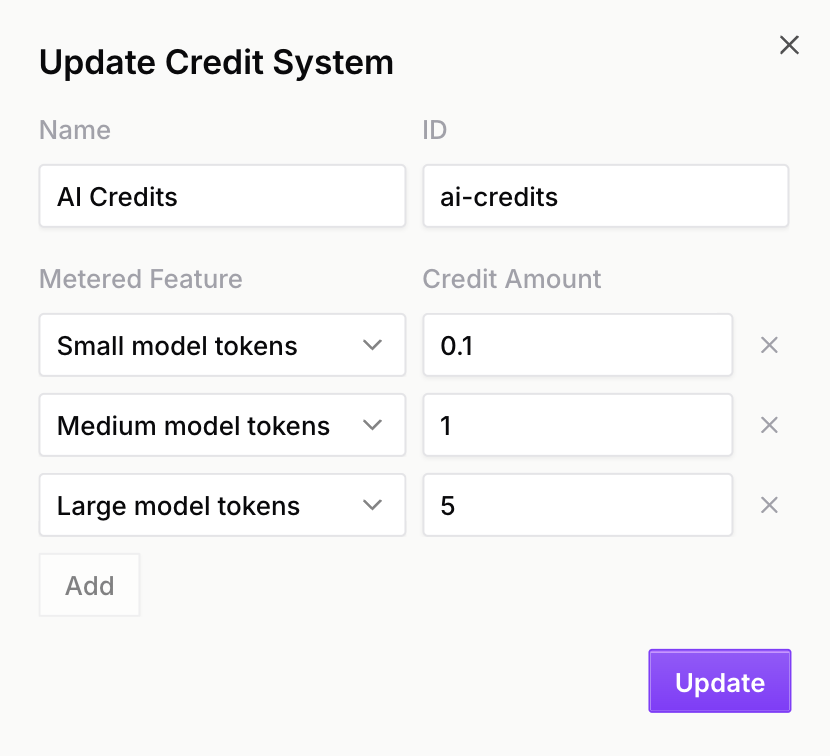
Our credit system is a monetary system, so we’ll convert the credit amounts to a cost in cents per token used:
- Small model: 0.1 cent per token
- Medium model: 1 cent per token
- Large model: 5 cents per token
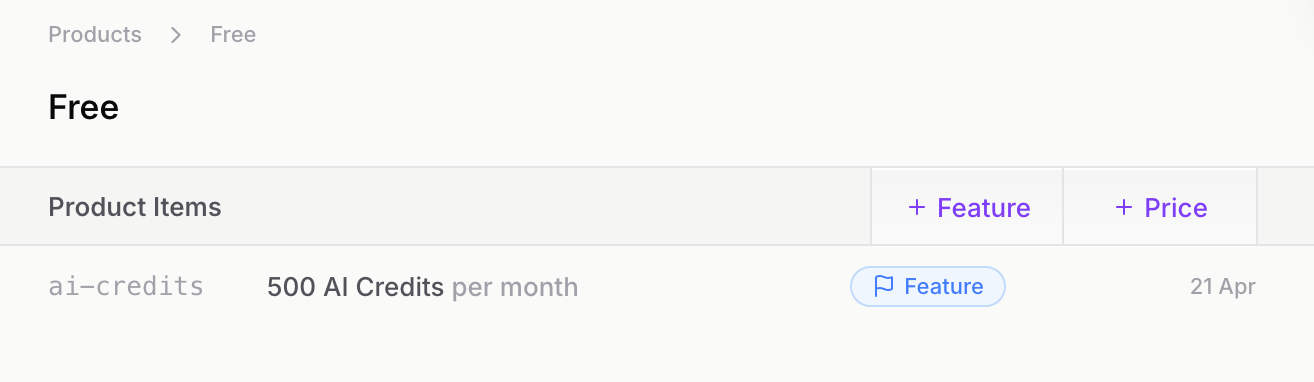
Free Product
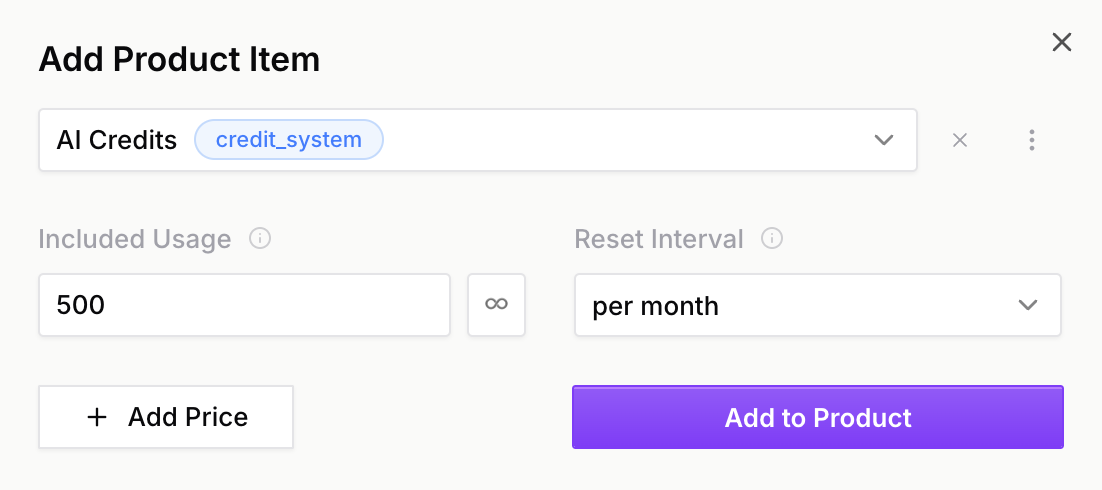
Let’s create our free product. Since we’re not charging for this product, we’re not creating any pricing. Since we want to give $5 credits for free, and each credit is 1 cent, we’ll give 500 credits for free.
Make sure we set the free product as a default product so it is
automatically assigned to any new customers.
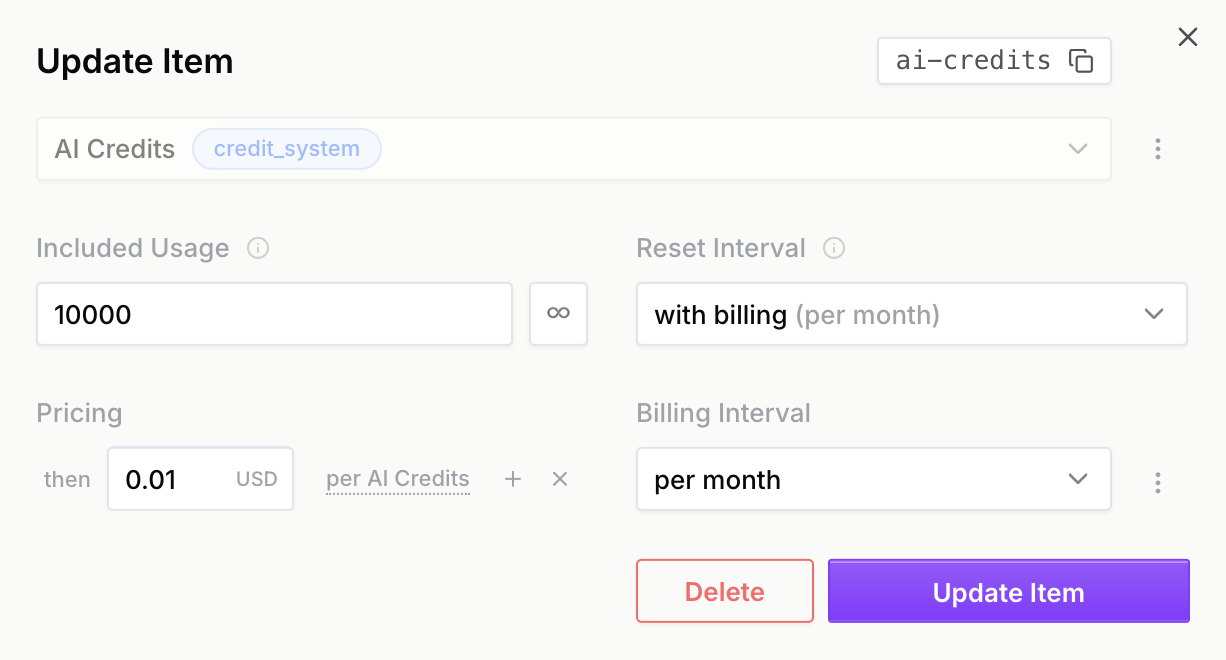
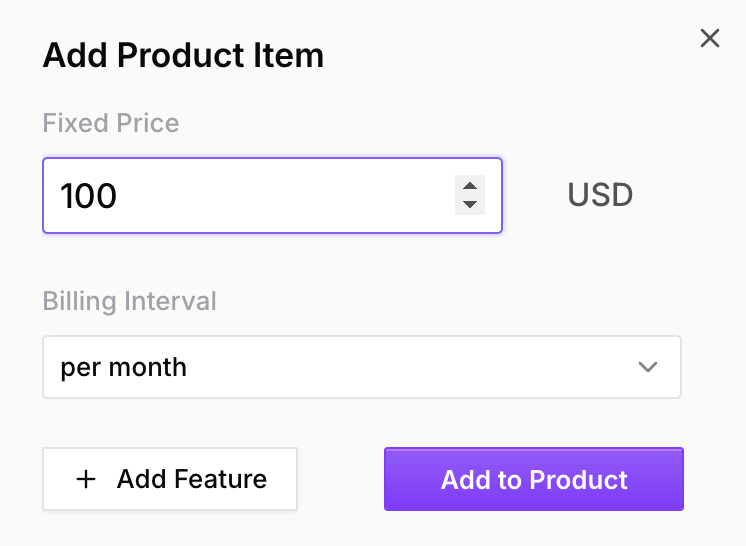
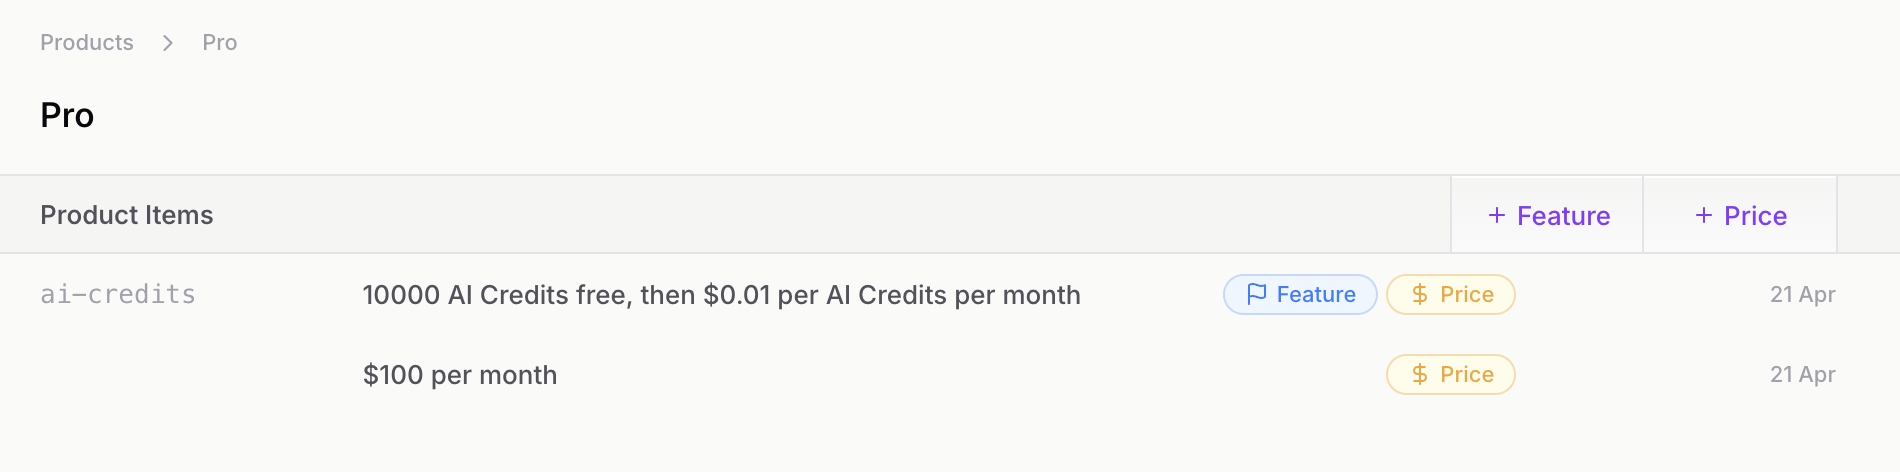
Pro Product
Now let’s create our pro product. We’ll create a pricing of $100 per month, and set the overage pricing to 1 cent per token.
We’re now ready to implement our credit system!
Implementation
Checking for feature access
Every time our user sends a message to the chatbot, we’ll first check if they have enough credits to send the message. This is so our free users don’t exceed their 500 credit limit.
Our pro users will always have allowed: true as they have overage pricing enabled.
Note how we’re interacting with the underlying features (small-model-tokens,
medium-model-tokens, large-model-tokens) here—not the credit system.
Autumn automatically created our customer and assigned them the free product.
Using up credits
Now let’s implement our usage tracking and use up our credits.
- 2000 small model tokens * 0.1 cents per token = 200 cents
- 60 large model tokens * 5 cents per token = 300 cents
If we call the check endpoint again (as we should before using any of the models), we can see that the balance and allowance fields have been updated. Since allowed is false, we should prompt the user to upgrade.
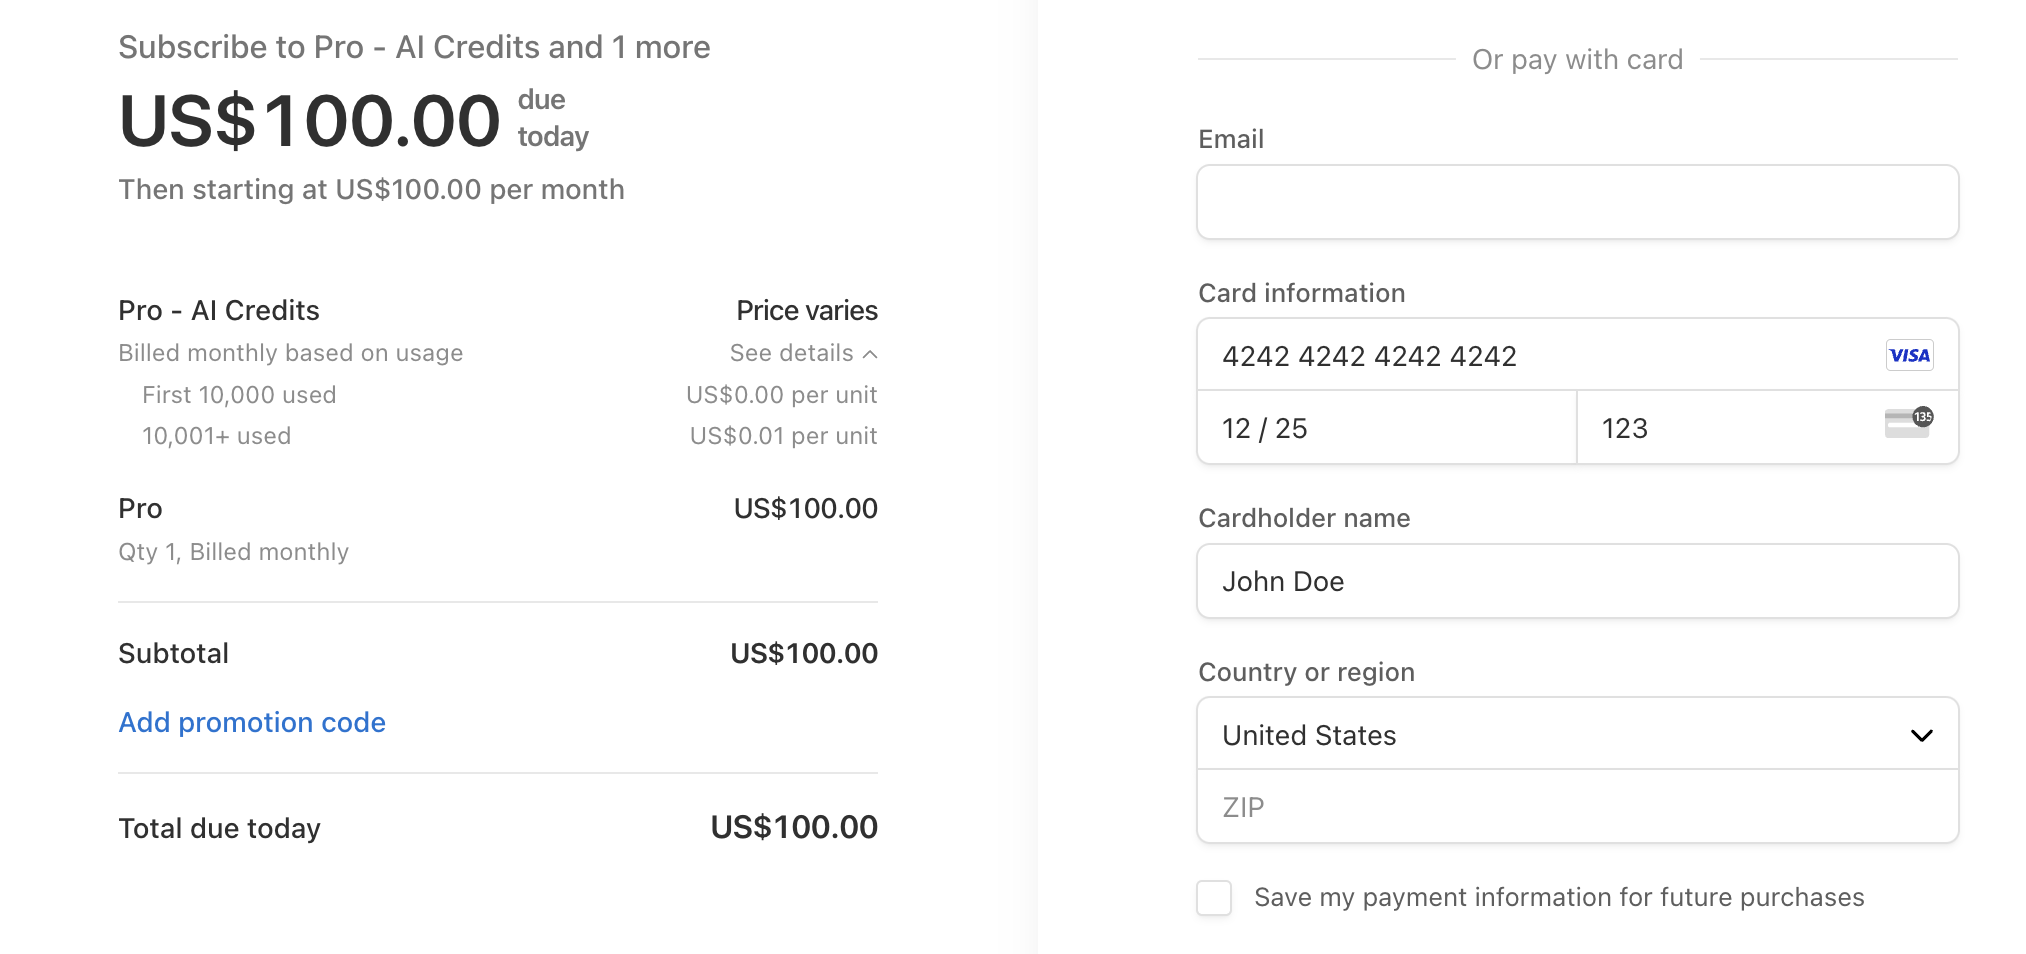
Upgrading to Pro
We can prompt the user to upgrade. When they click our “upgrade” button, we can use the attach route to get a Stripe Checkout URL for them to make a payment.
We can now redirect the user to the checkout_url to complete their purchase. Our checkout URL should look like this:
Going into overage
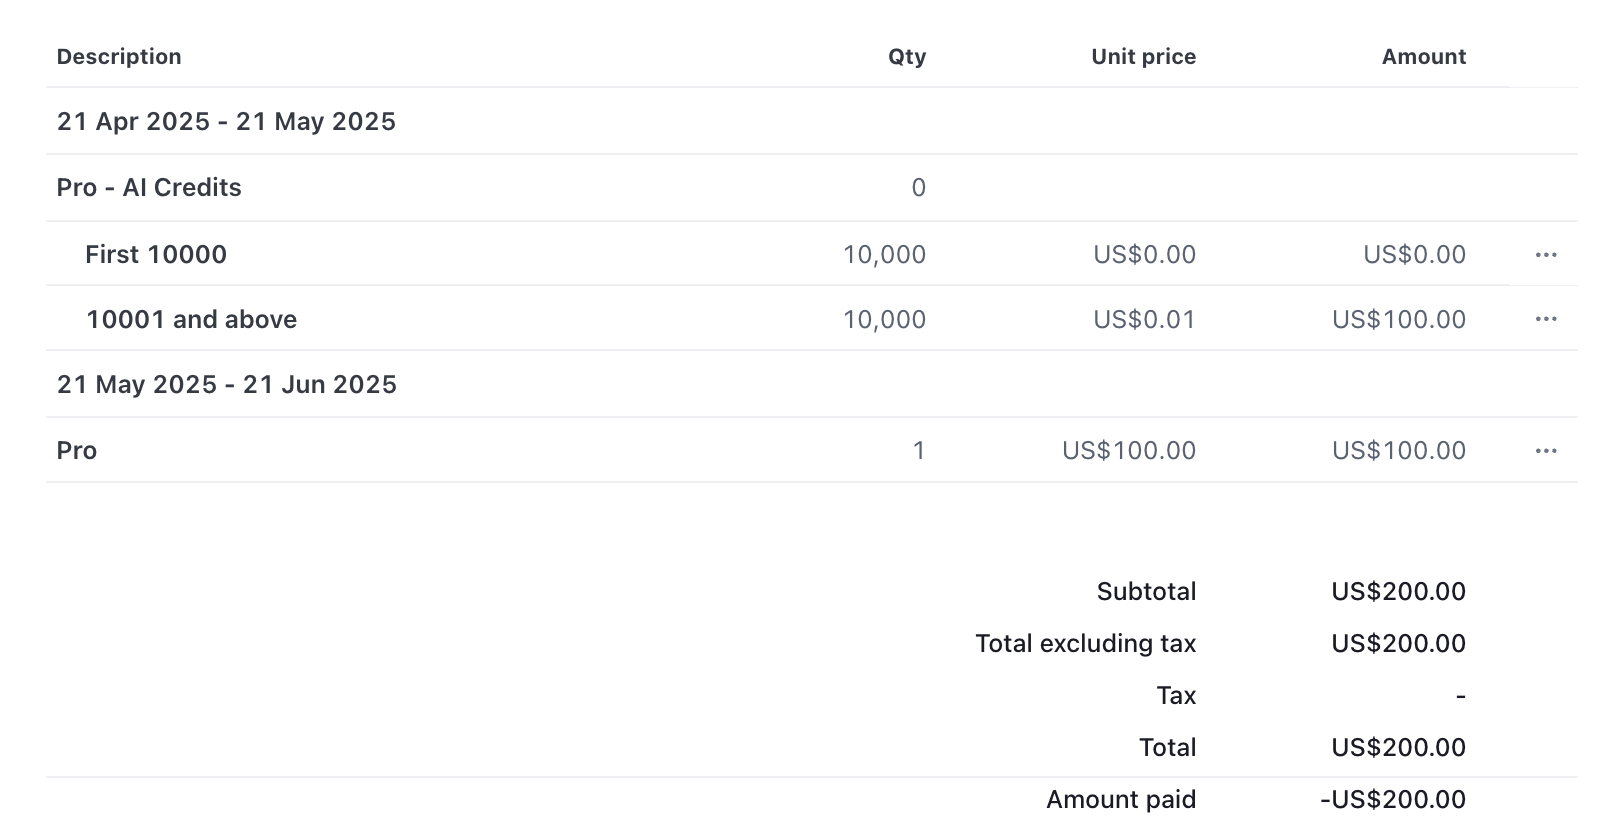
Since we have overage pricing enabled, the check route will always return allowed: true for our pro users. Let’s use up some more credits to see what happens:
- Small model: 50,000 tokens * 0.1 cents per token = 5,000 cents (50 USD)
- Medium model: 10,000 tokens * 1 cent per token = 10,000 cents (100 USD)
- Large model: 1,000 tokens * 5 cents per token = 5,000 cents (50 USD)
Total spent: 200 USD
Overall we’ve used 200 USD of credits, or 20,000 cents. As expected, our balance is at -10,000 (10,000 credits with the plan - 20,000 credits used).
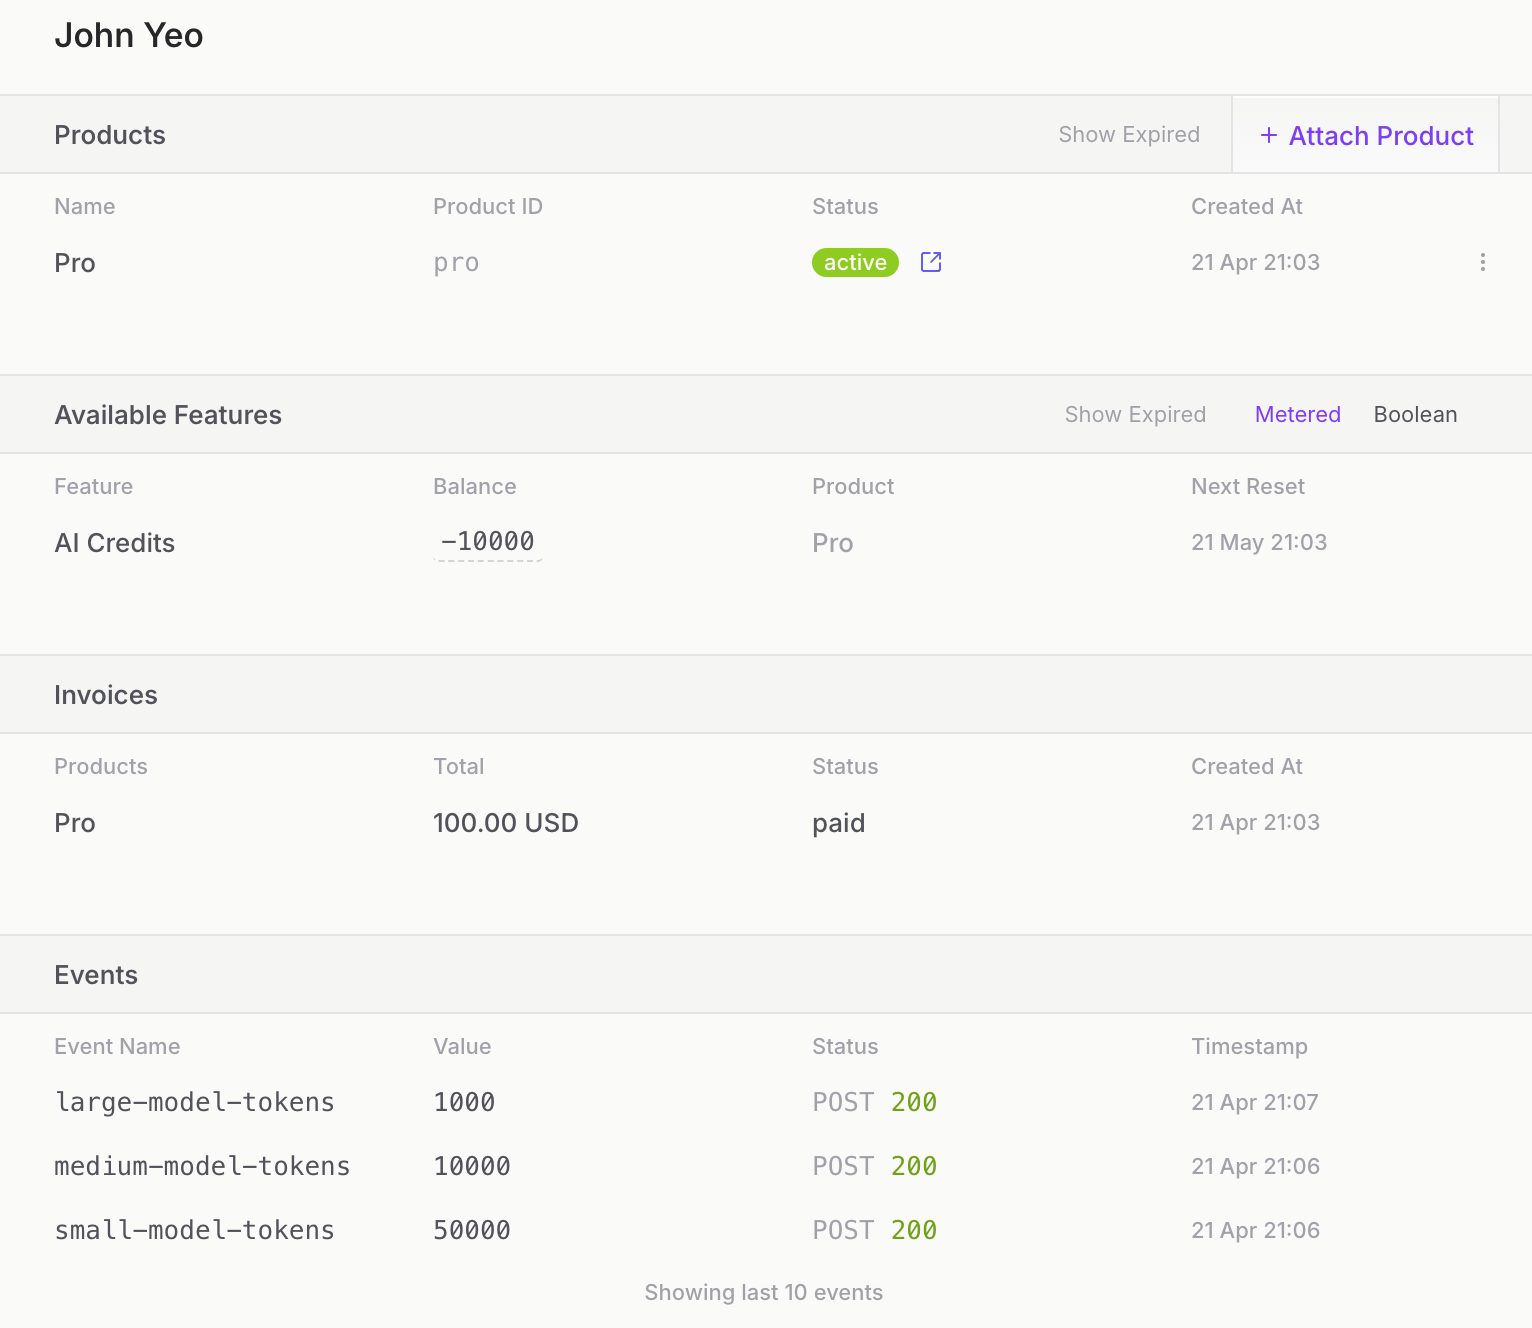
This means we’ll be billed for 100 USD overage in our next billing period. When our next invoice comes, it looks like this: